How to replace Stump Grinder Teeth
Step by step guide to replacing teeth on a Stump Grinder
What you need to replace Stump Grinder Teeth:
- A torch or other method of heating that will reach about 1500°F
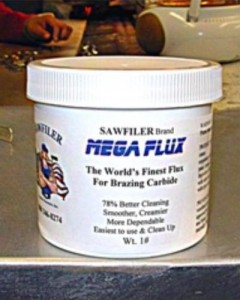
- Black flux – must be a brazing flux, not a solder flux
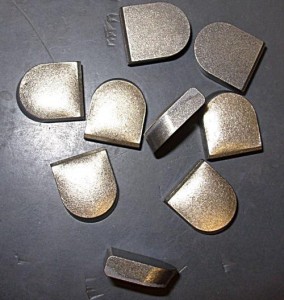
- New, pretinned stump grinder teeth (a tip with braze alloy already on it)
- A pokey stick such as an old file. A ceramic rod is better but harder to find.
1. Removing the old Stump grinder teeth
You heat the old stump grinder tooth up with a torch and then you flick or push the old tooth off. The old stump grinder tooth will typically not fall off on its own. Folks, to retip sawblades use kind of a sharp, flicking motion to knock the old tooth off.
2. Preparing for new stump grinder teeth
If you are replacing stump grinder teeth all you need to do is put the new tooth, braze alloy side down, in the same place the old tooth was. The new braze alloy will mix with the old braze alloy just fine.
If you are putting grinder teeth on your stump grinder for the first time then you need to make sure that your steel is free of scale or rust as well as free of oils or greases. Just wiping the steel clean may or may not work. Using a strong caustic cleaner and a thorough rinse is a much better way to clean steel for brazing.
3. Using the brazing Flux
You need a brazing flux, not a soldering flux. Using the wrong flux is the number one problem with replacing stump cutter teeth. Brazing occurs over 800° F and soldering occurs below 800° F. If you try and use a solder flux it will get all burned up before the braze alloy even starts to melt.
Flux serves as a cleaner and it prevents oxygen from getting into the braze area. If oxygen gets to the braze alloy then the braze alloy will burn up. If you have flux in the joint area than the braze alloy will melt and join successfully.
Just paint a little brazing flux into the area where you will be putting the new stump grinder tooth. Use the thinnest layer that you can get while still covering up the old braze alloy. If you use way too much the new tooth will tend to float away. If you don’t use enough then the flux will get burned up.
4. Placing the new stump grinder tooth
Put the new stump grinder tooth into the notch so that the gold, braze alloy side is against the brazing flux.
5. Heating the stump grinder tooth
Heat the tooth through the carbide. Steel will expand about two or three times as much as the carbide so heating through the carbide helps even this out. If you get the steel above 1500° F the steel will get brittle so you really want to heat through the carbide.
As you heat, three things will happen:
1. The water will boil out of the brazing flux
2. A little bit later the brazing flux will turn to liquid and spread out
3. Finally the braze alloy will melt
This is why you need the pokey stick or file
6. Using the pokey stick
When the water boils out, the flux turns liquid and when the braze alloy turns liquid the part can float and shift a little. Use the pokey stick to gently nudge the part back where you want it. Do not push down on the part with the pokey stick or anything else
7. Braze Joint Thickness
A thin layer of braze alloy in the joint will give you greater tensile strength. A thick layer of braze alloy in the braze joint will give you more impact protection and cushioning from shock. Our pretinned tips have a very carefully calculated amount of braze alloy on them to give you the best combination of braze joint strength and impact protection. Do not push down on the tip. You will push all the braze alloy out which wastes money and makes a much weaker braze joint.
8. Heat the stump grinder tooth to about 1400 F
This is sort of a dark cherry color. If you see any yellow or orange you have got the tip too hot. The pictures here are pretty good but they were taken in a dim light area. If you are brazing under bright light the colors will look different.
9. When you are done
Once you have the tooth heated up properly and nudged into the place you want it then gently pull your torch away while you hold the tip in place. Do not push down on the tip, just hold it in place.
Let the stump grinder tooth cool completely to room temperature by itself.
Do not use water to cool it.
Do not attempt to test the tooth or to use the tool before the stump grinder tooth has cooled to room temperature.
Tags: Braze alloy, brazing flux, stump grinder, stump grinder teeth
6 Responses to “How to replace Stump Grinder Teeth”
Leave a Reply


im in the rental equipment business and use up a lot of stump grinder teeth esp the yellow jacket .im thinking of trying to braze some of the teeth due to cost effective wanting to know if the process is for a amature
Hi there, yes brazing does not have to be difficult! But, there are certain guidelines that should be followed so you can be successful as possible. Click here for tips on effective brazing, and please watch our how-to brazing videos on our YouTube channel here.
Hi,
Can you tell me what percentage of cobalt you have in the Yellow jacket pretinned carbide tips? The standard ones supplied by Vermeer are rubbish and I am thinking of re-tipping instead of wasting my time resharpening them.
Mike
Hi Mike, yes we do ship to Australia! Also the cobalt % for the Yellow Jackets are 15.0. Please feel free to place your order online at http://www.carbideprocessors.com or, call us at (800) 346-8274.
Jo
Hi again,
I forgot to ask. Do you ship to Australia?
Mike
I just purchased my stump grinder last month and just getting the hang of it. Is it recommended to have an expert replace the teeth first rather than trying it out yourself?