


Welcome to the Carbide Processors Blog
Boring Bits / Brad Point Drill Bits / Spur Point Bits – Hard to Find Tools FOUND HERE!
Posted on Tuesday, May 30th, 2023 at 8:10 pm.

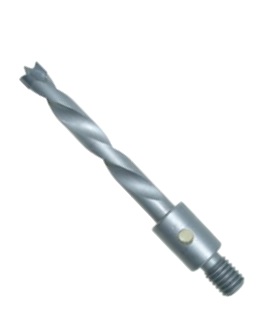
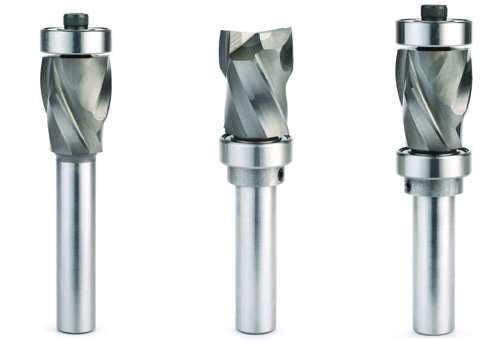
Finding brad point drill bits (aka spur point or boring bits) have been the bane of many woodworkers, especially those looking for a threaded shank. The company that originally produced these bits went out of business a number of years ago and, since then, many people have been on the hunt for these tools.
Carbide Processors is the go-to source for these hard to find bits because of our long time partnership with multiple manufacturers (such as Southeast Tools, Vortex, and Whiteside) who still make these bits either as standard parts or as customs. All of our suppliers use high quality raw materials to fabricate their bits so, start to finish, you are getting the best product possible for your projects.
Even if you are not able to find the bit you are looking for on our site, send us an email and let us know what you are looking for. Sometimes, if you’re looking for a threaded shank, we can pair you up with a drill chuck that will make a standard-make tool work for your needs. Additionally, some tools may be listed as “unavailable” but many times we can source through other suppliers or make them as custom tools which we are always happy to facilitate.
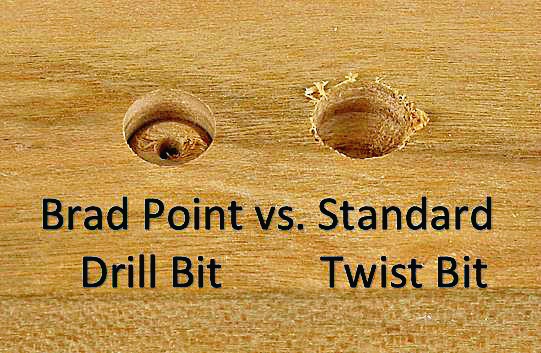
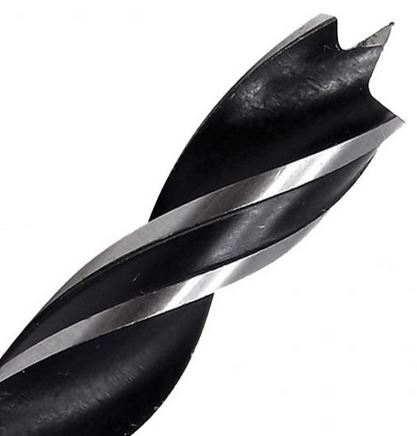 Brad point bits are universally used in making furniture, cabinetry, and a wide variety of woodworking projects. People love brad point bits because of their superior accuracy for the hole’s starting point and leaves a smooth, finished hole. The spur cutting edge ensures that the material does not splinter as the bit moves through it. This combination creates a finished product that is not only precise but also finished so that it does not require any additional tooling to give you a clean, professional result. Another benefit of these bits is that they are incredibly versatile and can often be used in a variety of materials such as certain plastics and thin sheet metal. If you have questions about whether or not a brad point bit is right for your job – just ask us! We’re here to help and even if the brad point isn’t the right tool for the job, we’ll help you figure out what is.
Potential UPS Strike – July 31, 2018
Posted on Monday, June 11th, 2018 at 1:24 pm.
 As you may have heard, there is a potential UPS strike on the horizon for the end of July. This strike is contingent upon contract negotiations which are already underway.
Not to worry though! You can rest assured that your team here at Carbide Processors is already working hard to put a plan in place to make sure that our customers’ orders are not affected.
In the event of a strike, we will be utilizing other freight companies to make sure that our deliveries are completed in the most timely fashion possible. Our customers should not anticipate any delays or changes in the delivery of their orders with the exception of normal external factors (such as weather, international customs, etc.).
If a strike does occur but you would still like to use UPS delivery services, we will not be able to offer any guarantees beyond what is given to us by UPS. Unfortunately, these details will not be available unless or until a strike has been officially announced.
Please do not let the potential of a strike deter you from placing your orders – We will always go the extra mile to make sure that your order gets to you as efficiently as possible.
Remember!!! We still have our Father’s Day raffle running through Monday, 6/18. 1 entry for every $100 spent with 3 chances to win! See all the details and prizes here. Simply make your purchases and you will be automatically entered.
Also, be sure to check out our sale page which is regularly updated with amazing deals and discounts on some of our most popular items!
*Don’t forget — all order over $150 ship for free!!!*
*Free standard ground shipping within the continental US
Enter to Win Father’s Day Gifts — Get Ready to Win!!!
Posted on Thursday, June 7th, 2018 at 7:00 am.

So we all know the usual gifts for Father’s Day – ties, watches, grill gear – but let’s talk about getting you the gift you REALLY want. We have some killer gifts (list below) that we are going to be giving out and the best part is – you don’t have to do anything but order as normal to enter! Of course, this is great for everyone, not only Dad’s so be sure to get your orders in to put yourself in the running!
Simply place your order ($100 minimum for entry) and you will automatically receive 1 entry for every $100 spent* (ie. $200 = 2 entries, $300 = 3 entries, etc.). There is no limit on how many times you can enter and there is no limit on how many times you can win!
Entries will start on Thursday, 6/7/18 and will continue through Monday, 6/18/18. All orders received between these dates will be eligible for entry. If you would like to opt-out or request “no purchase” entry please call or click here.
3 winners will be randomly selected on Tuesday, 6/19/18 and will be contacted by the email address on their order with each winner being able to select their gift from the list below. We will ship all gifts at no cost to the winners and all prizes must be claimed by Friday, 6/29/18.
At Carbide Processors, one of our favorite things to do is show our customers how much we appreciate their business and this is one of those exciting opportunities for us. We have hand selected some of our most popular products for the prizes in the hopes of offering some really desirable, high quality tools for this giveaway.
GIFT OPTIONS:

7 Pc Kraftform Kompakt Screwdriver Set (Sl/Ph/Pz), Wera 05051021001
VALUE: $53.61
3 pc Router Bit Set for Undersize Plywood, 1/2 Shank, Whiteside 470
VALUE: $61.31
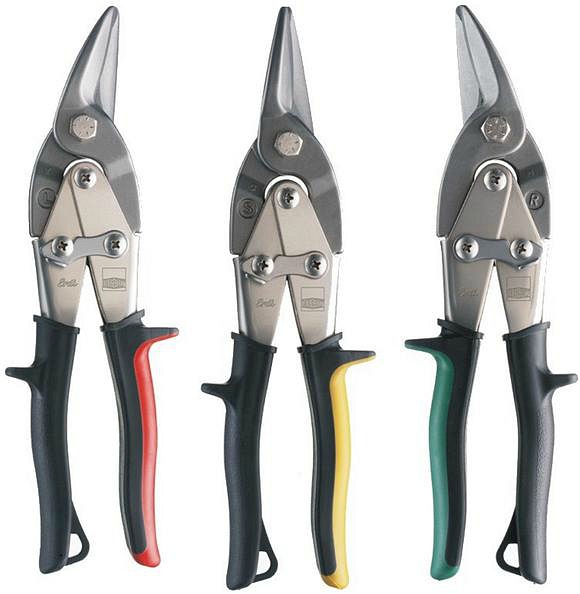
Aviation Snippers, 3 pc. Set including Right Direction, Left Direction and Straight snips, Bessey D16-SET
VALUE: $55.55
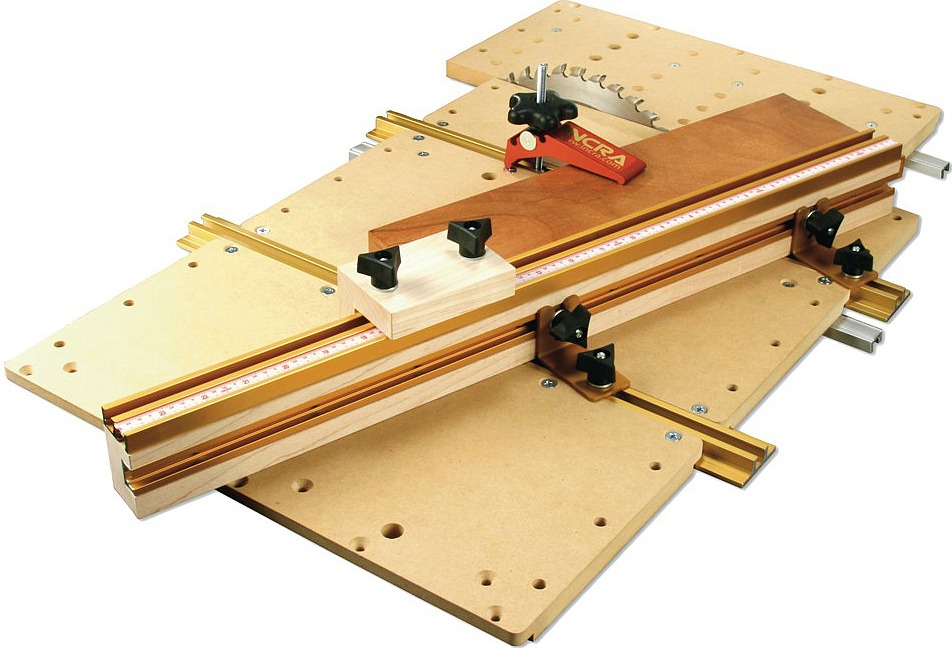
Build It Starter Kit System, 5 Free Jig Plans, Incra 851-BLDKIT
VALUE: $124.95
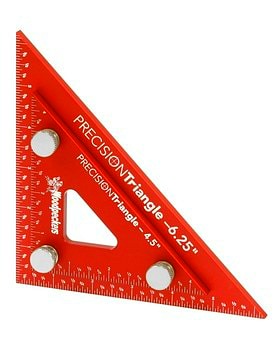
Woodpeckers 6″ Carpenter Square, 710-CRPSQ6-INRD
VALUE: $74.99
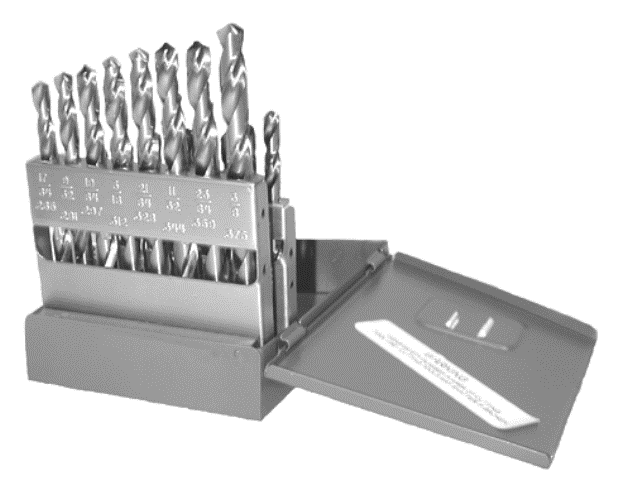
13pc Jobber Length Drill Set, 832-SEJS13M

$50.00 Carbide Processors Gift Certificate
VALUE: $50.00
Place your orders and get ready to win!!!
*No Purchase Necessary – Contact us for entry
Custom & Hard-to-Find Tools
Posted on Tuesday, June 5th, 2018 at 1:58 pm.


Need hard to find tooling? Let us help! We are your one stop shop for everything you need no matter how tough to find! CUSTOM router bits, saw blades, carbide tooling, AND MORE! We truly believe in working for and with our customers to strive for 100% satisfaction every time.
Never feel the need to settle for anything less than exactly what you want. Whether you’re working on custom cabinetry or are tired of modifying a saw blade for your needs, Carbide Processors will work hard to get you a reasonable price on high-quality tooling. Our fabricators are top-notch and work directly with us to ensure that the part you need is the part you get.
Even if you’re just trying to track down a tool – don’t waste time calling hardware stores or browsing for hours online. Just give us a call and let us find it for you! You can always expect friendly, helpful service without any pressure. So often we will get calls from customers at their wits end because they’ve searched high and low for a part that we’re able to find or quote in a matter of minutes. Even tooling that is “out of production”, like brad point drill bits, counterbores, countersinks, and forstner bits.
Let us partner with you to make your project go smoothly from start to finish and give you the desired finish the first time. With over 30 years in the business we pride ourselves rarely ever coming across a tool that we can’t find or make – stop with the headache and let us do the hard work for you!

CUSTOM TOOL ORDER FORMS: Saw Blades, Band Saw Blades, Router Bits, Carbide Parts
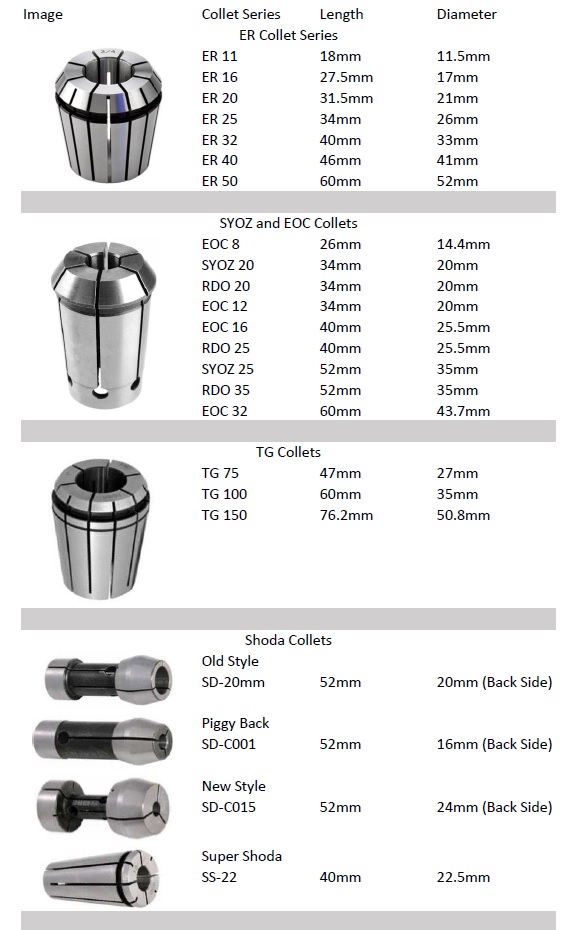
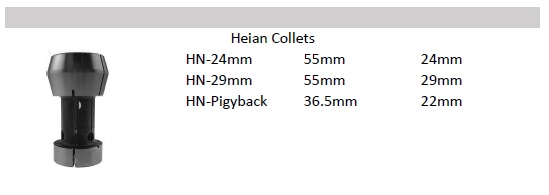
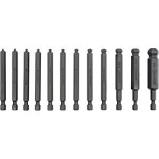
Choosing the Right Collet
Posted on Monday, January 16th, 2017 at 3:51 pm.
For CNC Tooling it may be a little tricky figuring out which collet you need for your machine. Almost all Collets have a distinct Length and Diameter. Measuring the length of the desired collet can really help to point you in the right direction to finding the right collet. Use this handy collet chart below as a guide.
FREE Woodworker West Magazine- While Supplies Last!
Posted on Tuesday, December 13th, 2016 at 3:06 pm.
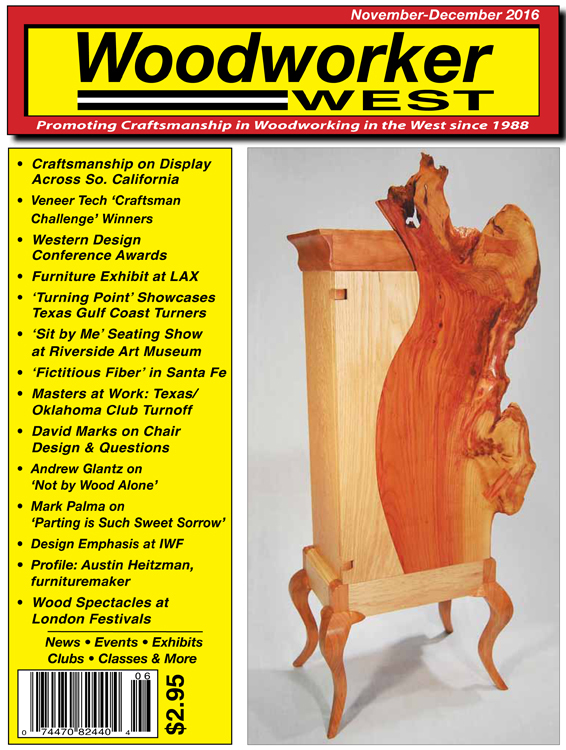
For the last 1-1/2 years we have proudly advertised our exceptional products in the Woodworker West magazine. The decision was easy- Carbide Processors only advertises print ads in publications that directly reflect our own values when it comes to woodworking. We believe in providing our customers with solid, quality products as well as the knowledge to properly utilize the tools they purchase.
Woodworker West is a magazine dedicated to providing the novice and seasoned woodworker important woodworking information found in articles, show publications and a “What’s New” section on current events. A bi-monthly publication, you can pick up the Woodworker West at a steal of only $2.95 per issue! That’s less than $20.00 for a year subscription.
Here are just a few condensed excerpts ;
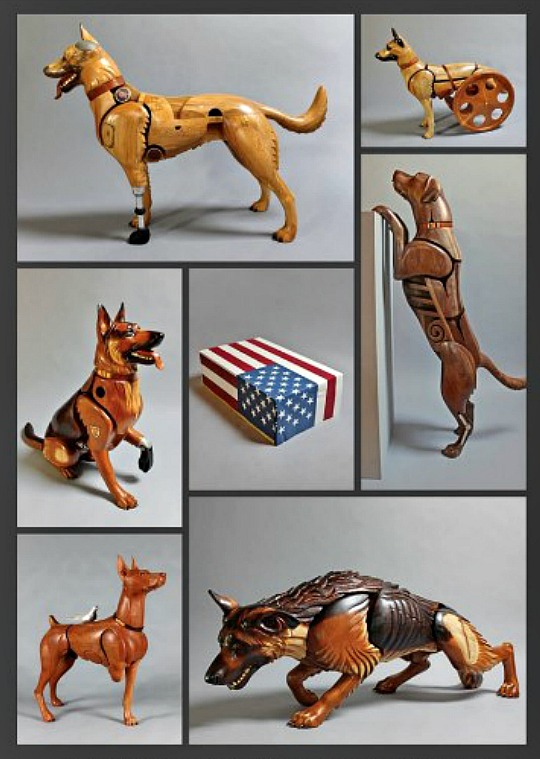
Wood Takes Artprize Grand Prize
…the announced winner is wood sculptor James Mellick of Milford Center, OH. His installation Wounded Warrior Dogs Projects consists of wooden dog sculptures, symbolic of the sacrifices of all war veterans. Six dogs, representing service in various wars, portray types of sustained in juries suffered in battle….
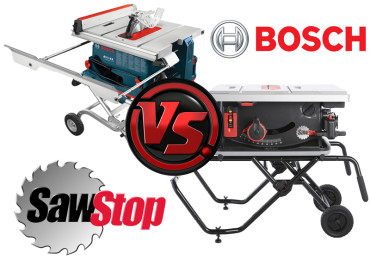
Bosch vs. Sawstop Lawsuit
The first round in the legal battle between tablesaw manufactures Bosh and SawStop goes to SawStop. In a suit filed before U.S. International Trade Commission, and administrative judge issued an initial ruling in September that Bosh’s new Reaxx table saw infringes upon two of SawStop’s flesh-detecting patents.
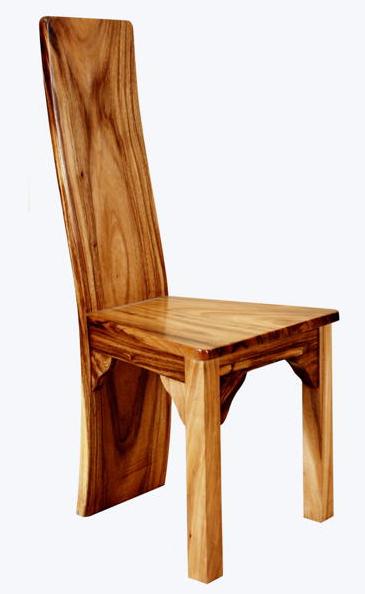
Designing a Chair & Question
It has been said by many furniture makers that chairs are one of the most challenging pieces of furniture to build. The reason for this is that in order for a chair to be successful, it has to be strong enough to support the weight of an individual as well as being comfortable enough to sit in for lengths of time and looking aesthetically pleasing from a 360 degree perspective.
Carbide Processors would like for you to enjoy a Woodworker West November – December publication for free! We will cover the shipping and handling. If you are interested in taking advantage of this one-time exclusive offer, please email Jo at emgt@carbideprocessors.com. Limited quantities available, only 1 magazine per customer. Please don’t wait to receive your free copy of this outstanding publication!
Access Early Black Friday Deals Now!
Posted on Thursday, November 17th, 2016 at 1:14 pm.

They say, “good things come to those who wait.” Carbide Processors says, “….those who wait, miss out on great deals!”
Enjoy up to 40% off retail on some of our most popular brands- Incra, Whiteside, Triton, Bondhus, Bessey, M. Power, Triumph and more. Take advantage of free shipping within the continental U.S. on orders of $150 or more by using coupon code- ship150
Here are just a few of the incredible items we have heavily discounted. Please see our Pre-Black Friday Page to take full advantage of these savings!

Incra is a made in the U.S.A. company out of the Dallas-Forth Worth area. Known for their beautiful dovetail joinery, Incra tools and accessories produce the most accurate wood joinery obtainable
 The Incra Cleansweep Dust Collector is a precision molded ABS and Steel cabinet that works with your 4″ dust collector. This dust Collection cabinet works at the source to keep saw dust out of the way of your work, keeping your shop clean and dust free.
 The MITER1000HD allows you to precisely set and quickly duplicate any angle you might need. Features include- 180 indexed angle stops, GlideLOCK bar, flip stop, 1/10 vernier cusor, steel protractor and extender fence from 18′ – 31″.

U.S. Made Whiteside Router Bits have consistently been rated number one among Router Bits year after year by Fine Woodworking Magazine. For 40 years Whiteside Machine Company has supplied woodworkers with American made quality tools.
 We’ve teamed up with Whiteside machine to bring you what we feel is truly an essential router bit set. Set includes #2006– 1/4in diameter roundover bit, #1084– 3/4in. diameter 2 flute straight bit, and #2405– 1/2in. diameter 2 flute flush trim bit.
 Save on all 3 Whiteside Ultimate compression bits! The flush trim bit, UDFT9112 is great for template or wood matching surfaces. The pattern/plunge bit, UDP9112 features the compression spiral design and ball bearing guide to produce superior quality trimmed edges. The UDC9112 does both-flush trim as well as plunge!

Quality and precision have been at the heart of every Triton power tool. Triton continues to produce quality routers, saws, cordless power tools, and work stations with the same devotion to quality that they had over 35 years ago when they created their first Workstation.
 The Triton Workcentre is a incredibly versatile woodworking station with a multitude of optional accessories to help you tackle any woodworking project. With several accessory options to choose from, the Workcentre can me customized to fit your exact needs.

All Bondhus tools are made in the U.S.A and guaranteed for life. Bondhus tools are known for their vastly superior quality, strength, durability, and resistance to rust and corrosion.
 The Bondhus 10836 -12 piece balldriver ball end hex tip set features a ProGuard finish for durability and to prevent rust. This set includes the following sizes: 5/64, 3/32, 7/64, 1/8, 9/64, 5/32, 3/16, 7/32, 1/4, 5/16, 3/8 and 1/2.

Bessey Tools began in 1889 as internationally recognized “world-class” steel makers and have grown to become industry leaders and innovators in the clamping and cutting tools industry. Bessey Tools put quality at the core of their manufacturing process and only use the finest steel to produce their products.
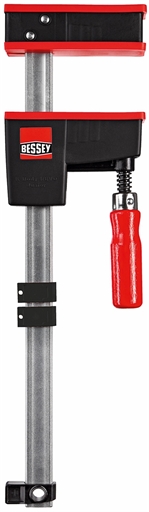 The Bessy K-Body line is one of our hottest selling clamp lines we offer. The REVO K-body clamp has the capacity to accurately clamp at 90 degree angles. Featuring a large clamping surface, these clamps have a clamping force up to 1500 lbs, making them a ideal for even the toughest jobs.
 Bessey’s all steel, XM5-B nickel plated spring clamps come packed with power. They feature a heavy duty spring for a tight fit, and black vinyl covered tips and handle to prevent marring with a non-slip grip.
Start saving on these and many more exceptional products. Don’t wait until Black Friday, save NOW!
Smelly tools stinking up your tool box?
Posted on Tuesday, October 4th, 2016 at 2:50 pm.

Have you ever gone to your trusty tool box to grab a tool and found yourself wondering, what on earth is that awful smell? If so, you are not alone.
After doing some research and reading many forum posts, I think I have finally solved the mystery of the terrible odor coming form your toolbox. The odor is actually caused from the break-down of cellulose acetate butyrate, a thermoplastic that is used to make many tool handles. So, all those times you blamed your kids, wondering what on God’s Great Earth they spilled in your tool box, it was actually just the tools. An even bigger issue than the terrible odor is that when this material starts to breakdown, it can actually corrode your tools. Not all tool handles are made with this type of thermoplastic, but many are. If you have some old Craftsman Screwdrivers with clear/clearish handle, try giving them a good sniff. If you’ve had them a while, you may be able to tell just what kind of smell we are talking about.
After learning about this, I wanted to make sure that we were not adding to the problem of the smelly tool box with any of the tools we sell. I’m happy to report that neither Bondhus or Felo Screwdrivers use cellulose acetate butyrate in the handles of their tools. So to keep your nose happy and your toolbox smelling fresh (or as fresh as possible) stock it with Bondhus and Felo hand tools.
Choosing the Best Finish for Your Work
Posted on Monday, October 3rd, 2016 at 2:55 pm.
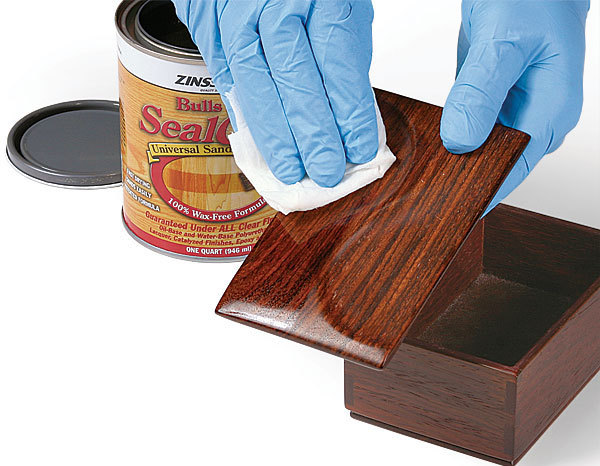
Choosing the right finish for your project can be extremely difficult, especially when there are so many to choose from. But, there are some basic questions that can help determine which finish is right for your project.
How Will the Project be Used?
Projects for outdoor use require a different finish then say a top coat for a salad bowl. Nail down the specific use and demands of your project before applying a finish. For projects that will not be subject to excessive sun or moisture, consider using lacquer, shellac, oil or oil-varnish blends. You might find wiping a couple coats of paste furniture wax will work fine as a finish. All of these finishes are easy to repair if they are scratched. One important thing to note is not all paste wax, oils, shellac, lacquer and some water-based finishes can be damaged if exposed to water for long periods of time. Also, shellac is not resistant to alkalis like ammonia and lacquer will break down in the presence of alcohols.
In regards to food contact there really is no “best” finish. Mineral oil will not go rancid and is great option for cutting board projects. An option for food baskets and bowls is several coats of de-waxed shellac. It seals the wood against water penetration and can be easily cleaned with a damp cloth. Shellac is an excellent finish for toys that children may put in their mouth. Some water-based varnishes are also child-safe, but always read the label carefully.
How Do You Want the Wood to Look?
For natural-looking finishes wipe on several coasts of tung oil, linseed oil or use a varnish blend. However any finish such as shellac, lacquer or varnish can produce the same effect as long as you don’t build up the finish beyond several coats. A great tip is to thin the finish using the appropriate solvent making it flow more evenly in the pores of the wood.
To achieve a more elegant, glass-smooth finish choose a hard, film-forming finish like shellac, lacquer or varnish. As a general rule, oils and oil-based varnishes build luster best, followed by solvent-based lacquers and shellac.
How Clean, Warm and Dry is Your Shop?
If your working area is cold or filled with dust, fast-drying finishes like spray-on lacquer and shellac are good choices. Falling dust in the finish will not be as problematic as slow-drying finishes like oil-based varnish. Shellac and lacquer are easy to use in cold temperatures, and they can be modified with additives for use in hot and humid conditions as well.
Some Things to Remember
Finishes contain harmful chemicals that can be dangerous without proper safety precautions. Remember to wear lightweight gloves to protect your skin and safety glasses to guard your eyes. Work in a well ventilated area to combat hazardous fume emissions. Never work near a gas furnace, wood-burning stove or other flame.
Following these general guidelines will allow you to successfully choose the correct finish for your project and maintain your safety.
Template Routing
Posted on Wednesday, September 28th, 2016 at 1:17 pm.
Woodworkers that consistently make projects that have curved shapes find template routing extremely valuable. A custom made template can be routed for one certain shape or several different shapes to complete a project.
Template Material

Templates should be made of sturdy inexpensive material such as MDF. Some woodworkers prefer to use quality plywood with a reliable edge surface. The template material should be at least 1/4 inch thick to provide enough bearing surface, but no thicker than 3/8 inch. This will make the material more easy to cut, sand and shape then a thicker piece of stock. Don’t worry if the edges get a bit out of square with the faces, the router will be able to correct this on the final work-piece.
Routing the Template
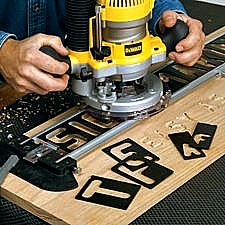
You can follow the template using a straight router bit and a template guide bushing mounted to the router base. This allows the bushing to ride against the template while the smaller diameter router bit makes the cut. Keep in mind the template needs to be sized a little larger than the actual part to compensate for the difference in diameters between the bushing and the router bit.
Another option is to use a straight router bit with a bearing mounted above or below the cutter. This technique will allow you to make a template that is the exact size and shape of the planned project part.
Attaching the Template
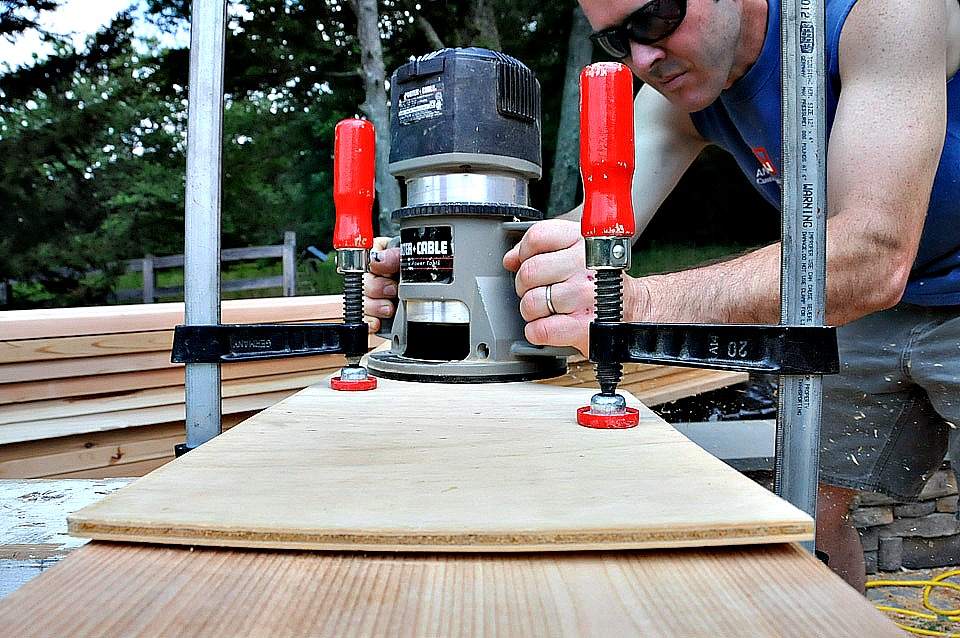
Once the template is created attach it to the work-piece using clamps or double-stick tape before routing the shape. Some shapes have sharp corners that cannot be cut using a router. These corners will need to be squared off by using a wood chisel.
Making Your Template Using Your Router
- Draw or trace the pattern onto your material and use a jigsaw to cut out the shape. Use sandpaper to smooth the edges or a chisel to square off corners.
- Clamp or attach the template to the work-piece. Then set the router cutting depth to equal the combined thickness of both the template and work-piece.
- Next clamp these items to your work-surface with a scrap piece of wood to act as a spacer. Make sure you have room for the router base to clear the clamp.
- Drill a starter hole in the waste area(if using a fixed base router) then rout along the edge of the template to make the cutout.
Make Your Life Easier
You can reduce the mess and routing time if before you attach the template , you cut away the excess waste from the work-piece with a band-saw or jigsaw. Leave only about 1/8 inch to be router off.
