


Template Routing
Woodworkers that consistently make projects that have curved shapes find template routing extremely valuable. A custom made template can be routed for one certain shape or several different shapes to complete a project.
Template Material

Templates should be made of sturdy inexpensive material such as MDF. Some woodworkers prefer to use quality plywood with a reliable edge surface. The template material should be at least 1/4 inch thick to provide enough bearing surface, but no thicker than 3/8 inch. This will make the material more easy to cut, sand and shape then a thicker piece of stock. Don’t worry if the edges get a bit out of square with the faces, the router will be able to correct this on the final work-piece.
Routing the Template
You can follow the template using a straight router bit and a template guide bushing mounted to the router base. This allows the bushing to ride against the template while the smaller diameter router bit makes the cut. Keep in mind the template needs to be sized a little larger than the actual part to compensate for the difference in diameters between the bushing and the router bit.
Another option is to use a straight router bit with a bearing mounted above or below the cutter. This technique will allow you to make a template that is the exact size and shape of the planned project part.
Attaching the Template
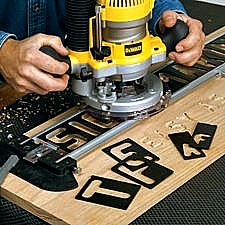
Once the template is created attach it to the work-piece using clamps or double-stick tape before routing the shape. Some shapes have sharp corners that cannot be cut using a router. These corners will need to be squared off by using a wood chisel.
Making Your Template Using Your Router
- Draw or trace the pattern onto your material and use a jigsaw to cut out the shape. Use sandpaper to smooth the edges or a chisel to square off corners.
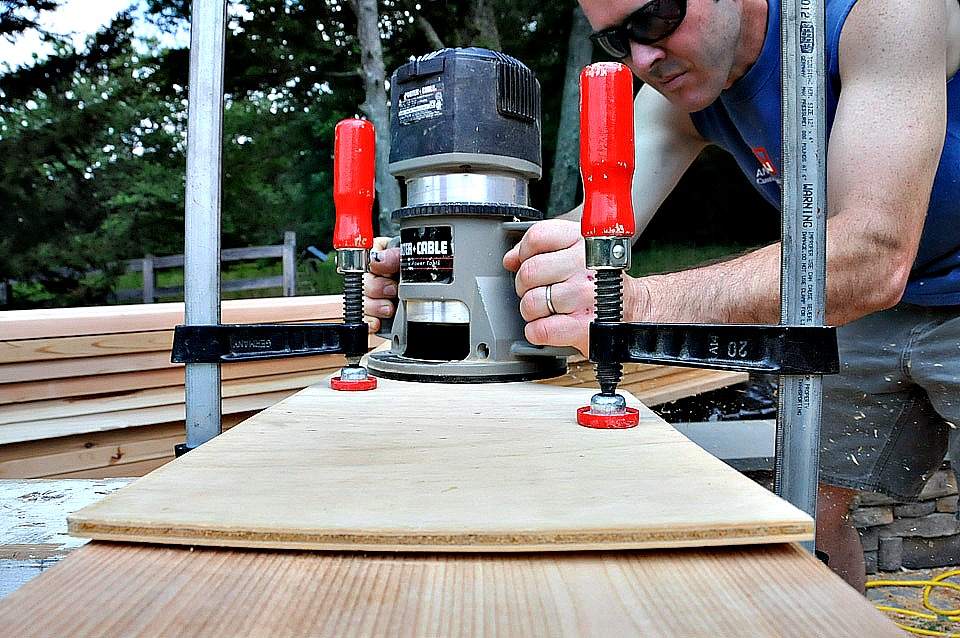
- Clamp or attach the template to the work-piece. Then set the router cutting depth to equal the combined thickness of both the template and work-piece.
- Next clamp these items to your work-surface with a scrap piece of wood to act as a spacer. Make sure you have room for the router base to clear the clamp.
- Drill a starter hole in the waste area(if using a fixed base router) then rout along the edge of the template to make the cutout.
Make Your Life Easier
You can reduce the mess and routing time if before you attach the template , you cut away the excess waste from the work-piece with a band-saw or jigsaw. Leave only about 1/8 inch to be router off.
Tags: bushings, clamps, compression bits, handheld routers, router bit bearings, routing templates, straight router bits, woodworking
Leave a Reply
