Inspecting a Router Bit
Inspecting a Router Bit
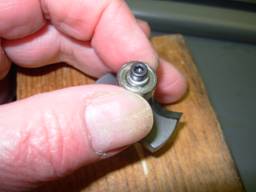
First, just pick the bit up and look at it. Does it look even and balanced? Any dings or similar?
Then spin it in your fingers to see if you notice anything. I start by inspecting the shaft
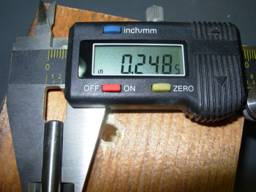
This is an ordinary digital caliper. I first put the router bit fully between the jaws and hold it up to the light. I want to see if any light comes through either side. Then I measure the diameter of the shaft in several places. This was a ¼” shaft and measured 0.248 all the way up and down. I think the shaft should be a couple thousandths under size because that was the way I was taught. In reality router chucks are very forgiving. A little oversize should be fine. I variation of a thousandth or two in shaft diameter should also be fine. I do think it is a sign of a quality part when the shaft is a bit undersized and the same diameter all the way up and down.
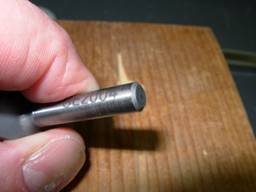
I want the shaft to clearly marked so that I know what it is and can buy an identical one later.
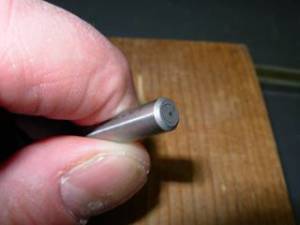
I like a nice bevel on the end of the shaft. It is probably not that important but it means the manufacturer took an extra machining step. It does make it slide in and center a bit more easily. It also means that the edge is less likely to deform if banged or dropped.
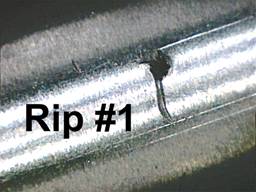
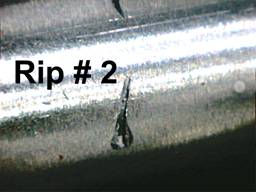
What is wrong is any sort of rip or tear (sometimes called an upset) in the shaft. These could be easily filed out and the bit would be perfectly serviceable but it is a mistake.
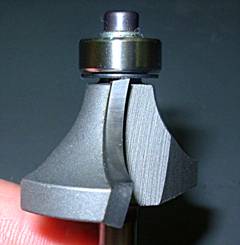
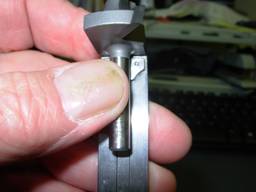
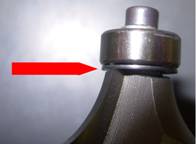
You want the shaft to be square with (perpendicular to) the body. This can be somewhat tricky. On this bit the shaft tapers into the body, which is good, and the carbide (red arrow) sticks down below the body which is also good. However that leaves a very small area for testing. Ideally you would rest the shaft against the caliper body. In this case it has to set away a bit.
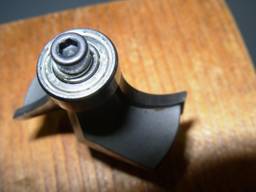
Take your bearing and turn it slowly so you can feel it. There should be just a wee bit of drag which means it is tight. It should feel uniform all the way around. It should not spin freely. Twist the bearing a bit to make sure it has some play. 0.005” to 0.010” is pretty good. You also want a sleeve or dust guard between the bearing and the router body. I like to use an inspection block for the next part. This is a piece of Fir 2 x 4 with a hole drilled in it.
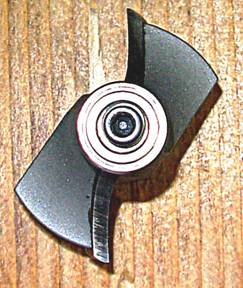
The carbide should be identical from one side to the other. This is really important for balance since carbide is 50% heavier than lead. The carbide should be the same thickness all the way down the wing (or flute). Depending on how good or bad the grinding is you can sometimes see where the carbide is thinner in the middle or at one end. This greatly increases the chances of the carbide snapping in use.
Generally thicker carbide is better because it is stronger. It also gives you the opportunity to dress or re-sharpen more times. However dressing and sharpening both remove material and thus change the type of cut the bit makes.
Carbide is graded from C 1 – C 4 typically. C 1 is tougher for rough cutting. C 4 stays sharp longer but is more likely to break in rough work.
There are advanced carbide grades that are both tougher and that give longer life. They really do work well and are still a bargain even if they cost a bit more. If it is an American, European or Japanese brand you can almost always trust the package information in this area. I have never seen one that was misleading but I haven’t seen them all. There can be excellent tools from other sources but I am not familiar enough with all of them to give an opinion.
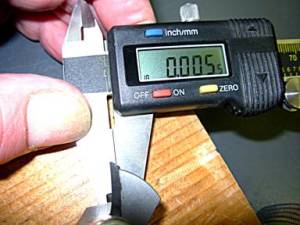
Ideally you want to see a line of braze alloy about 0.003” thick between the carbide and the steel. Here the calipers are set at 0.005”. You can see that it is a very small line. The average hair is maybe 0.007”. The bit was probably sandblasted after brazing to clean it up so you may not be able to see anything yellow. Look at the joint. You don’t want the carbide resting against the steel since it breaks easily that way. You want a nice, even line with no holes or just very few small holes in the braze alloy. If the braze alloy has a gold or yellow color that is better than a copper color. It means more Silver in the braze alloy which means it brazes at a lower temperature. In turn this means much less thermal stress and much better cushioning and protection for the carbide. This not a really big deal, however.
Tags: american made router bits, carbide router bits, router bits, woodworking
Leave a Reply


