


Bandsaw Blade Brazing

Bandsaw (Band Saw) Blade Brazing
Six Easy Steps
- Clean and bevel the blade ends
- Clamp blade ends to the fixture
- Spread the flux
- Braze
- Anneal
- Remove excess alloy
With a very small, narrow blade it may be possible to join the two ends by soldering. Soldering occurs below 800 F. (Other temperatures are sometimes given but they are all in this range.) Soldering is low temperature and typically makes a soft, weak joint.
With larger blade and with blades where a strong joint is needed you will braze.
Selecting a Solder or Braze Alloy
You will need a “silver solder” or “silver based braze alloy”.
Typically solders have something like 3 to 5% Silver in them. Braze alloys have a silver content somewhere around 50%.
There are typically four alloys that work well. They are sold under various names. I have included the BAg numbers as these are the official AWS (American Welding Society) designations. You can typically identify the alloy from a supplier based on the number sued. E.g. Easy Flo 3 is a Bag-3 alloy. 50Ni2 is a 50% silver with 2% Nickel.
These alloys melt over a range. The solidus is the highest temperature where they could be considered a solid. The liquidus is where they are officially a liquid. It is typicvally good practice to melt the braze alloy to a point about 50 F over the liquidus.
- BAg-3; 50% Silver with Cadmium 1170 solidus to 1270 liquidus. Strongest braze joints. The historic favorite. Easy to use and strong joints. Not used as much in the past decade due to the health risks with Cadmium.
- BAg-22; 49% Silver with Manganese. 1260 solidus to 1290 liquidus. Strongest braze joints. As strong as Bag-3 and Cadmium free. A bit harder to use. Brazes pretty much like the other alloys but it does have a tendency to form little nodules or lumps.
- BAg-24; 50% Silver and Cadmium free. 1220 solidus to 1305 liquidus. About 30 to 40% weaker than the above alloys. Takes a little more heat. When it does get to temperature it wants to run faster and farther.
- Bag-8; 56% with Tin. 1145 solidus to 1205 liquidus. Very easy to use but a comparatively weak alloy.
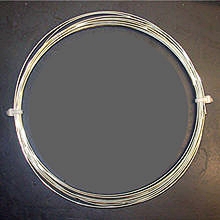
These alloys come as a paste, a ribbon or wire.
- Paste is easiest to use and most expensive. It is flux and alloy mixed together with a binder to prevent the heavier alloy particles from separating to the bottom. You squeeze a little paste between the two parts and heat them.
- Ribbon is a thin strip. If you use ribbon it should be no more than 0.005” thick and 0.003” is preferable. You dip the ribbon in flux; put it between the two parts and heat.
- Rod or wire. Comes in various diameters and is generally least expensive. You flux both halves by dipping or painting. You can put a bit of wire between the two halves and apply heat. You can also apply heat until it is read then touch the assembly with wire or rod. If it is hot enough the alloy will flow into the joint.
You will need flux with ribbon or wire and extra fluxing with paste is a good idea. Black flux is more forgiving than white flux. Flux has some cleaning and oxide removal properties but best not to count on it. Start with clean parts instead. Flux is primarily an oxygen interceptor so that the parts and braze alloy do not oxidize.
Grind the Blade
Each broken end of the blade should be ground to an angle of about 45 degrees to provide a scarf joint. This process also cleans the damaged ends. Quickly running it across the bench grinder is enough to do this. A Dremel tool fitted with a small drum sander works well and is easier to control.
Grinding the ends with the teeth opposite to each other and grind both at once. Allow about a half inch for the lap joint.
![]()
You want to end up with the two ends looking something like this. A lap joint will be much stronger than a butt joint and you can do all your brazing from one side.
Once ground, keep the steel free of any oil and dirt.
Fixturing
The blade ends should be clamped onto a steel jig using toolmakers clamps, or something that will not overheat and burn or melt. Make sure this joint is aligned the way you want it.
These pictures will give you an idea. You can just use a flat piece of steel and see how that works for you. You want to hold the two halves in place without crushing any teeth. The steel will want to move a little as it gets hot. Be ready for it.
 |
.jpg") |
.jpg") |
Heating
If using wire coat each end of the blade with paste flux and heat the whole of the joint to bright cherry red before applying the solder. With the blade still bright cherry red gently pinch the joint together with a pair of pliers. This provides for a flat, even joint. Gently, gently, gently. Do not squeeze all the braze alloy out. If you have 0.001” to 0.002” braze alloy between the two parts it should be right. Less is o.k. as long as there is still some braze alloy.
Brazing the blade should be quick and easy. The blade is thin so it won’t a lot of heat to get it to temperature. If you use a paste flux the water will boil out. Then nothing. Then the flux will bubble up and look pretty bad. Then the flux clears up and braze alloy melts.
Remember the difference between heat and temperature. Flux gets used up by a combination of heat and time. Too much heat, taking too long to get silver braze to melt will cause flux to get used up dissolving oxides and go black and no longer work and also more time for blade to expand and the overlap joint to slip over it self getting a thicker joint with possible thin spots on both sides after grinding back.
Alternate Heating Method
You can also heat a pair of brazing tongs bright red and clamp the two parts together. The red-hot tongs wiIl heat the blade and melt the solder. Keep the tongs clamped on the joint until they turn black.
Inspection
Check to see that you have a nice even line of braze alloy all the way around the joint. If you have to you can reflux, reheat and apply more braze alloy. It should be the color of the original alloy without too many holes in it. Holes mean you boiled the zinc out of it.
Annealing
After you have heated the joint enough to get the braze alloy to flow, back off the heat and let it cool a bit. A short annealing carbon steel is necessary for high speed steel. The high speed steel blade joint is re-heated to slightly below the melting point of the solder and the torch’s flame backed away allowing the joint to slowly cool. The process is repeated two or three more times taking the temperature to a lower point each time and allowing the blade to cool slowly. File a piece of un-annealed steel and the file will slide. On the annealed steel it should bite.
Cleaning Flux
After the blade has cooled to room temperature, remove the excess flux by brushing under warm water. If you used enough flux it will be very dark and easy to remove once it has cooled. If the flux is clear and hard to remove you burnt it all up. Use more next time.
Grind or File Flat and Smooth
File or grind the blob of solder off flush with the surface of the blade and flat off the blade edges to allow smooth running of the blade through the saw guides.
**Notes**
- Do not use wood for a fixture for brazing. Brazing typically takes place above 800 F. Wood burns around 1200 – 1400 F. The most common braze alloys for this work (49, 50 or 56% Silver) melt around 1300F. An oxy -acetylene torch runs at 4,000 F +. Can’t see where using wood for a fixture is a good idea.
- Do not cut the blade near the original weld unless you cut the weld out entirely. Stay far enough away so that the weld from the factory does not get too hot to touch. Remember that the clamps will serve as a thermal barrier to some extent.
Tags: bandsaw blades, bandsaw problems, saw blades, woodworking
One Response to “Bandsaw Blade Brazing”
Leave a Reply

really is a wonderful Reviews. now I have a better understanding of bandsaw. Thank you very much.