Braze Alloy (Silver Solder) Melting Temperatures
Braze Alloy (Silver Solder) Melting Temperatures
Theoretical and Actual Practice
When we sell braze alloy and consult we use the official AWS American welding society temperatures from their publication ANSI/AWS A5.8 – 92.
These temperatures are entirely accurate but they were derived in laboratories under very tightly controlled conditions. In the real world they are, at best, a guideline.
This came up yesterday. I got a call from a very good engineer in a very good laboratory of a big company. We had sold them braze alloy and told them the melting point was 1305 Fahrenheit. They built an assembly with the braze alloy in the middle, put it in an oven, ran the temperature up to 1305F and then let the oven cool. This process had worked when they were using Bag-3, which is 50% silver braze alloy with cadmium. It did not work using Bag-24 which is a 50% silver without cadmium.
There are several issues here.
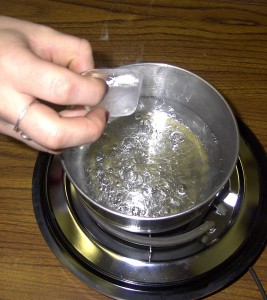
1. Braze alloy does melt at a given temperature. It takes energy to create the phase transformation from a solid to a liquid. If you drop an ice cube into boiling water it does not melt immediately. It melts over a period of time because it takes energy, applied as thermal energy or heat, to change the ice from a solid to
liquid. If you like, you can consider the ice cube as having thousands of layers and the energy required to transform each layer from a solid to a liquid slightly delays the process and sort of insulates the underlaying layer for a brief bit of time.
2. Each and every braze alloy melts a bit differently. Bag-3 melts and flows very easily. Other alloys are a bit “gummier”. In this case, “gummy” is a term used to describe an alloy that flows out slowly. The term “gummy” makes most sense if you are brazing by hand and trying to move the part into place during the brazing.
3. Braze alloys are comprised of several metals. One way of looking at this is that the lowest melting point metal, such as zinc, melts and liquefies which in turn melts other metals. (This is sort of right but it is much more complicated than that.) In any case there are braze alloys that will melt and there will be an extremely thin layer that runs out first. When you apply a little more heat you will see the bulk of the braze alloy flow out where the thin layer first flowed.
This can be due to the surface condition, how the heat was applied (although this is generally a minor consideration) or the kind of braze alloy being used.
Each and every braze alloy formulation has a slightly different chemistry and thus each and every braze alloy formulation melts differently. In many cases you may not notice the difference and in other cases it can be important.
4. Surface preparation can be critical. In a surface, such as tungsten carbide, there can be free carbon on top which means the braze alloy will just ball up and not flow out. In metals there can be oil and grease on the surface. These can seriously interfere with braze alloy flow.
A traditional method has been to burn the oil and grease off the surface during brazing. However this leaves a layer of burnt oil and grease which can also interfere with brazing.
In other places we show how to clean using a strong caustic cleaner such as Easy Off Oven Cleaner. We also have a simple, water break test where you need a little water in an eye dropper or similar. If you don’t have an eye dropper, we will send you one.
5. How the assemblage is structured can also influence the brazing process. Let’s take the example of the braze alloy which is supposed to flow at 1305F. Assume that we have an assemblage where there is a 2″ x 2″ steel block, on top of that is a 2″ x 2″ sheet of braze alloy and, on top of the braze alloy, is a 2″ x 2″ piece of tungsten carbide.
When you put this into an oven and run the oven up to 1305F then the braze alloy is hot enough to melt. The braze alloy is hot enough to melt but it needs more energy for the phase transformation from solid to liquid. You can hold the oven and exactly 1305F and eventually the braze alloy will melt. What is much more common is to set the oven at 1355F.
The only place I have ever seen a figure on actual practice versus theoretical melt points was in a NASA Tech Brief years ago. They derived the figure of 50F. This works very well in actual practice. It is still a ‘rule of thumb’ figure and needs to be treated as such.
When you put the 2″ x 2″ assembly into an oven there are three factors that keep it from melting at exactly the theoretical melt point.
A. The energy of transformation described above.
B. How well the braze alloy flows. Some alloys take a little more energy than others to achieve full flow.
C. The insulating properties of the assembly. In the example we have an assembly that has been placed in a cold oven and then the oven has been run up to temperature. The customers question was why the braze alloy did not melt at the melting point. In this scenario it takes a bit of time for the heat to move all the way through the assembly. As the heat moves from the outer edges to the middle of the assembly, the assembly is acting a bit like a heat sink to cool the outer edges of the assembly so the braze alloy may not be melting quite yet even though the temperature is at the theoretical melt point.
Conclusion:
Take the theoretical melt point and add 50° F when you’re brazing. This is a rule of thumb and the 50° is not sacred but it has proven to be a pretty good guideline for decades.
If you are running a really precision operation then you can take it up to temperature and hold it there for a bit before you let the oven cool down.
In both cases I suggest two things.
1. Before you use a new braze alloy and an assembly, take a piece all by itself, heat it up and watch how it melts.
2. Be prepared to experiment a bit to find the proper brazing temperature for your particular situation.
800 346-8274
Tags: Braze alloy, brazed tools, Brazing, Brazing Temperature, Silver Solder
Leave a Reply


