


Welcome to the Carbide Processors Blog
Setting Band Saw Drift
Posted on Monday, August 4th, 2014 at 3:20 pm.
A common subject that seems to get brought up and sparks a lot of debate in woodworking articles is resawing with a band saw, and more specifically, how to adjust the fence to follow the band saw drift. Everyone seems to have a pretty strong opinion as to what works best.
Band Saw Drift occurs because the differences in set and sharpness for the band saw teeth from one side of the blade to the other side of the band saw blade. Some people believe that heat can also play a role in band saw blade drift. This is due to the front of the band saw expanding more than the back and becomes slightly longer due to the heat caused by the cutting action of the saw teeth in the front of the blade. This can cause the blade to warp and contribute to band saw drift.
When resawing with a band saw, taking band saw drift into account is very important and finding a way to make adjustments so that the drift will not prevent you from getting nice even uniform cuts is imperative. The only thing that all the theories seem to have in common is that saw blade drift can be overcome by making just the right adjustments to the fence.
I found one article that talked about not following the drift at all, but instead overcoming the drift on your band saw or finding ways to compensate for it. They advised to install a stronger blade-tensioning spring on your band saw. Then, to set your saw’s fence square to the band saw blade and clamp the outfeed side to the machines table. Next, they instructed one to install ball-bearing blade guides in your band saw and adjust the blade guides so there is no clearance between the guides and the band saw blade. Last, make a simple jig using a block of wood, a couple nuts a bearing and a hinge for a farm gate. This method seemed to work in his shop, but every shop is different and has different ideas on how to better prevent band saw drift.
Another method of overcoming band saw drift was to make specific adjustments to the fence. First, the band saw must be correctly set up with a proper tension, the band saw blade guides must be accurately adjusted and a good sharp blade must be in place. Measure the drift angle using a bevel square. Once you know the angle, duplicate the angle by using a jig to set your fence to have the same angle. Here is a link to a video that can show you one way to do this.
Common Drill Bit terms
Posted on Monday, August 4th, 2014 at 11:56 am.
From A to Z, a short glossary of common Drill Bit terms and their meanings. If you are around people who have been in a specific industry for a while you may notice that they use a specific jargon or certain words that are pretty industry specific. For someone that is still pretty new to the tool industry, a lot of those terms may leave one a little puzzled. I took a short glossary of Drill Bit terms and their meanings from Triumph Twist Drills catalog. You can view Triumph Twist Drills full catalog online by clicking on the link.
Drill Bit Axis– The imaginary line that forms the lengthwise Center of a drill bit.
Drill Body– The section of a drill bit from the shank to the outer edges of the cutting edge.
Body Clearance Diameter– The portion of the land that has been cut away so it will not bind against the walls of the hole.
Chip Removal– The ability of a drill bit to pull material that has been cut away from the point, up the flutes of the drill and out of the hole.
Chisel Edge– The edge at the end of the web that connects the cutting tip
Chisel Edge Angle– The angle between the chisel edge and cutting tip, as viewed from the end of the drill bit
Cobalt Steel– A heat-resistant steel that increases the life of the drill bit
Drill Diameter– The diameter over the margins of a drill bit, measured at the point
Feeds– Feed rates for drilling are determined by the drill diameter, machinability of the material and depth of the desired hole. Small drills, harder materials and deeper holes require additional considerations in selecting proper feed rates.
Flute– Groove cut in the body of the drill bit to provide cutting surfaces, permit removal of chips and allow cutting fluid to reach cutting surfaces.
Flute Length– The distance from the outer edges of the cutting tip to the extreme back of the flutes.
Helix Angle– The angle formed between the leading edge of the land and the axis of the drill bit.
High Speed Steel– The high quality steel used in drill bits for most maintenance and industrial applications
IPM– Feed rate in Inches Per Minute. IPS (Inches per Revolution) x RPM (Revolutions per Minute)= IPM
IPR– Inches per second (The feed rate)
Land– The outer portion of the body of the drill bit between two adjacent flutes.
Lip– The cutting edge of a two flute drill bit which extends from the chisel edge to the outer edge.
Neck– The section of reduced diameter between the body and the shank of a drill bit.
Overall Length– The length from the end of the shank to the outer corners of the cutting lip.
Point– The cone-shaped cutting end of a drill bit, made from the ends of the lands and the web.
Point Angle– The angle of the cutting surfaces on a drill point, commonly 118 deg or 135 deg.
RPM– Revolutions Per Minute. RPM= (SFM(Surface Feet per Minute) / Dia) x 3.82
SFM– Surface Feet Per Minute. SFM= RPM x Dia x .26
Shank– The part of the drill bit that is held driven.
Size– Measurement reference for the diameter size of a drill bit. Drill bit size is usually expressed as either fractional, wire, letter or metric.
Speed– The speed of a drill is determined by the rate which the outer edge of the tool rotates in relation to the material being cut. In general, the SFM is within a range based upon the workpiece material, it’s condition, hardness and depth of the hole. The deeper the hole, the greater tendency for more heat to be generated. Speed reduction is often recommended to minimize the amount of heat. It is usually best to start drilling at a slower speed and increase till you reach your optimum Feed speed.
Split Point– A split point drill has a special point configuration that eliminates “walking” so holes stay center.
Why Should You Use Vortex Solid Carbide Sprial Tooling?
Posted on Monday, July 21st, 2014 at 1:49 pm.
So why should you use Vortex Solid Carbide spiral tooling, because some of the very unique tool cutting properties. Vortex Solid Carbide spiral tools create the best edge qualities of ANY cutting tool design available. Also, solid carbide router bits produce outstanding edge qualities at the fastest rates possible with any type of routing tools. The following information was taken from the Vortex Tool Company catalog:

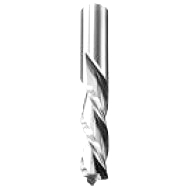
- This is a right hand upcut spiral bit with a right hand rotation cut. The upcut spiral will cause the chips to be “augered” upwards during cutting. This is particularly useful in slotting cuts or where chip removal is a problem. Upcut spiral bits have a tendency to “lift” the part in some cases. Additional holding power or stepped cutting depths may be required.
- Solid Carbide upcut spiral bits will leave a smooth cut on the bottom of a thru cut and tend to leave some fuzzing on the top edge in certain materials.
- Upcut spirals straight plunge/drill and have good end cutting geometry.
- A downcut spiral ( right or left hand) will have a downward chip flow that will also help in holding down the stock. The edge quality on the part is smooth on top and tends to be fuzzy on the bottom of certain materials.
- The downward chip flow can sometimes cause clogging problems particularly in a blind slotting situation. Downcut bits tend to preload the routing system and can substantially improve part hold down in marginal routing setup.
- Downcut tools can not be used to plunge straight into wood.
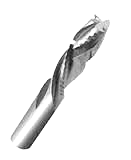
- A compression spiral is designed with upcut and downcut flutes. The upcut and downcut flutes compress the material being cut preventing chipping or fuzzing on the top and bottom of the cut.
- Compression spirals are used extensively for cutting double sided laminates, but can be used on natural woods where edge fuzzing is a problem.
Cutting Carbon fiber with a Paper Cutter
Posted on Wednesday, July 16th, 2014 at 10:17 am.
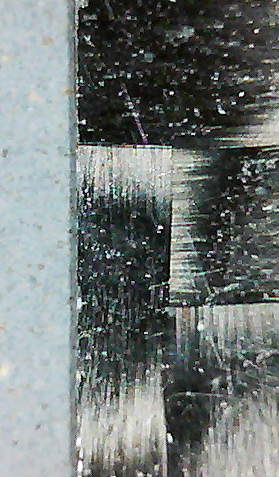
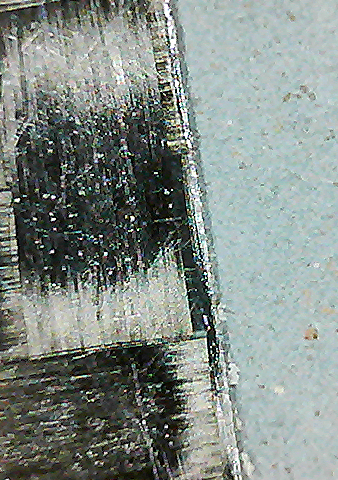
Cutting Carbon fiber with a Paper Cutter
It can work pretty well.
Paper cutter – decades old and never been sharpened.
Closeups 50x

Carbon Fiber and Paper Cutter

Choosing the Right Collet
Posted on Thursday, July 10th, 2014 at 2:38 pm.
There are many different types of collets and it can be difficult to know which one you need to fit your machine. The easiest way to find what type of collet you need to fit your machine is to measure the length and diameter of the collet. Each Collet series has several different options for inside diameter, so that you can select the right collet to fit your needs and your router.
Take a look at the chart below for a quick reference on which collet you need.
Type of Collet |
Collet Length |
Collet Diameter (OD) |
| ER11 Collet | 18mm (.708”) | 11.5mm (.45”) |
| ER16 Collet | 27.5mm (1.08”) | 17mm (.67”) |
| ER20 Collet | 31.5mm (1.24”) | 21mm (.83”) |
| ER25 Collet | 34mm (1.34”) | 26mm (1.02”) |
| ER32 Collet | 40mm (1.57”) | 33mm (1.3”) |
| ER40 Collet | 46mm (1.81”) | 41mm (1.61”) |
| SYOZ 20 Collet | 34mm (134”) | 20mm (.78”) |
| SYOZ 25 Collet | 52mm (2.06”) | 35mm (1.38”) |
| TG 75 Collet | 47mm (1.85”) | 27mm (1.06”) |
| TG 100 Collet | 60mm (2.36”) | 35mm (1.38”) |
| SD-20mm-SHODA Collet | 52mm (2.06”) | 20mm (back side) |
| SD-C001-SHODA Collet | 52mm (2.06”) | 16mm (back side) |
| SS-22 SHODA Collet | 40mm (1.58”) | 22.5mm (.89”) OD |
| SD-C015 Collet | 52mm (2.06”) | 24mm (back side) |
Using the right collet and making sure you check and change your collets regularly can play a critical role in how long your cutting tools last and their performance. Collets are made from a softer metal that have slots in them that allow them to collapse and spring so that they grip the cutting tools tightly. The collapsing and springing causes the collets to wear out, which can cause the tool holders and cutting tools to fail if the collets are not changed. If you find scoring marks on the inside diameter of the collet can indicate that the tool was spinning in the collet and is a big indicator that the collet needs to be changed. Collets should also be changed right away if you find any rust or pit.
When it is time to change those collets, shop with us and find the right collet at a great price. Use the table above to find the right collet and click here to save on the collet you need.
The Price of Carbide Saw Tips
Posted on Monday, June 30th, 2014 at 3:34 pm.
Carbide, you need it now, but you want it at the best price possible, without compromising quality. I hear this phrase almost 5 days a week, not only from our customers, but also from the Carbide Processors Team too!
There is nothing wrong with trying to make a dollar, it’s the American Dream! And as Americans we have the right to the pursuit of happiness; and what better way to achieve that than being able to care for our families, pay the bills and have a little money left over!
As an employee who sells carbide saw tips to friends, Saw Filers, Saw Mills and internet customers, I know how very important the quality of carbide, the pretinning of that carbide and having the correct tip is! The Carbide Processors Team pays absolute attention to quality and size as we weigh and ship expensive carbide tips that could mean a day in the red for a mill, or a complete total shut down.
I am proud to say that I work for a local company whose owner and employees always stand behind his/her work and takes every precautionary step in insuring that our customers know they will receive the correct tip, in a timely fashion with the utmost quality in carbide and pretin.
Every time we receive a carbide stock order we look at each piece to make sure the size is correct. We have received shipments with mixed tips and it is extremely time consuming to separate and measure each tip. Our credibility is extremely important to us as individuals and as a thriving small business.
 Can you tell which tip doesn’t belong?
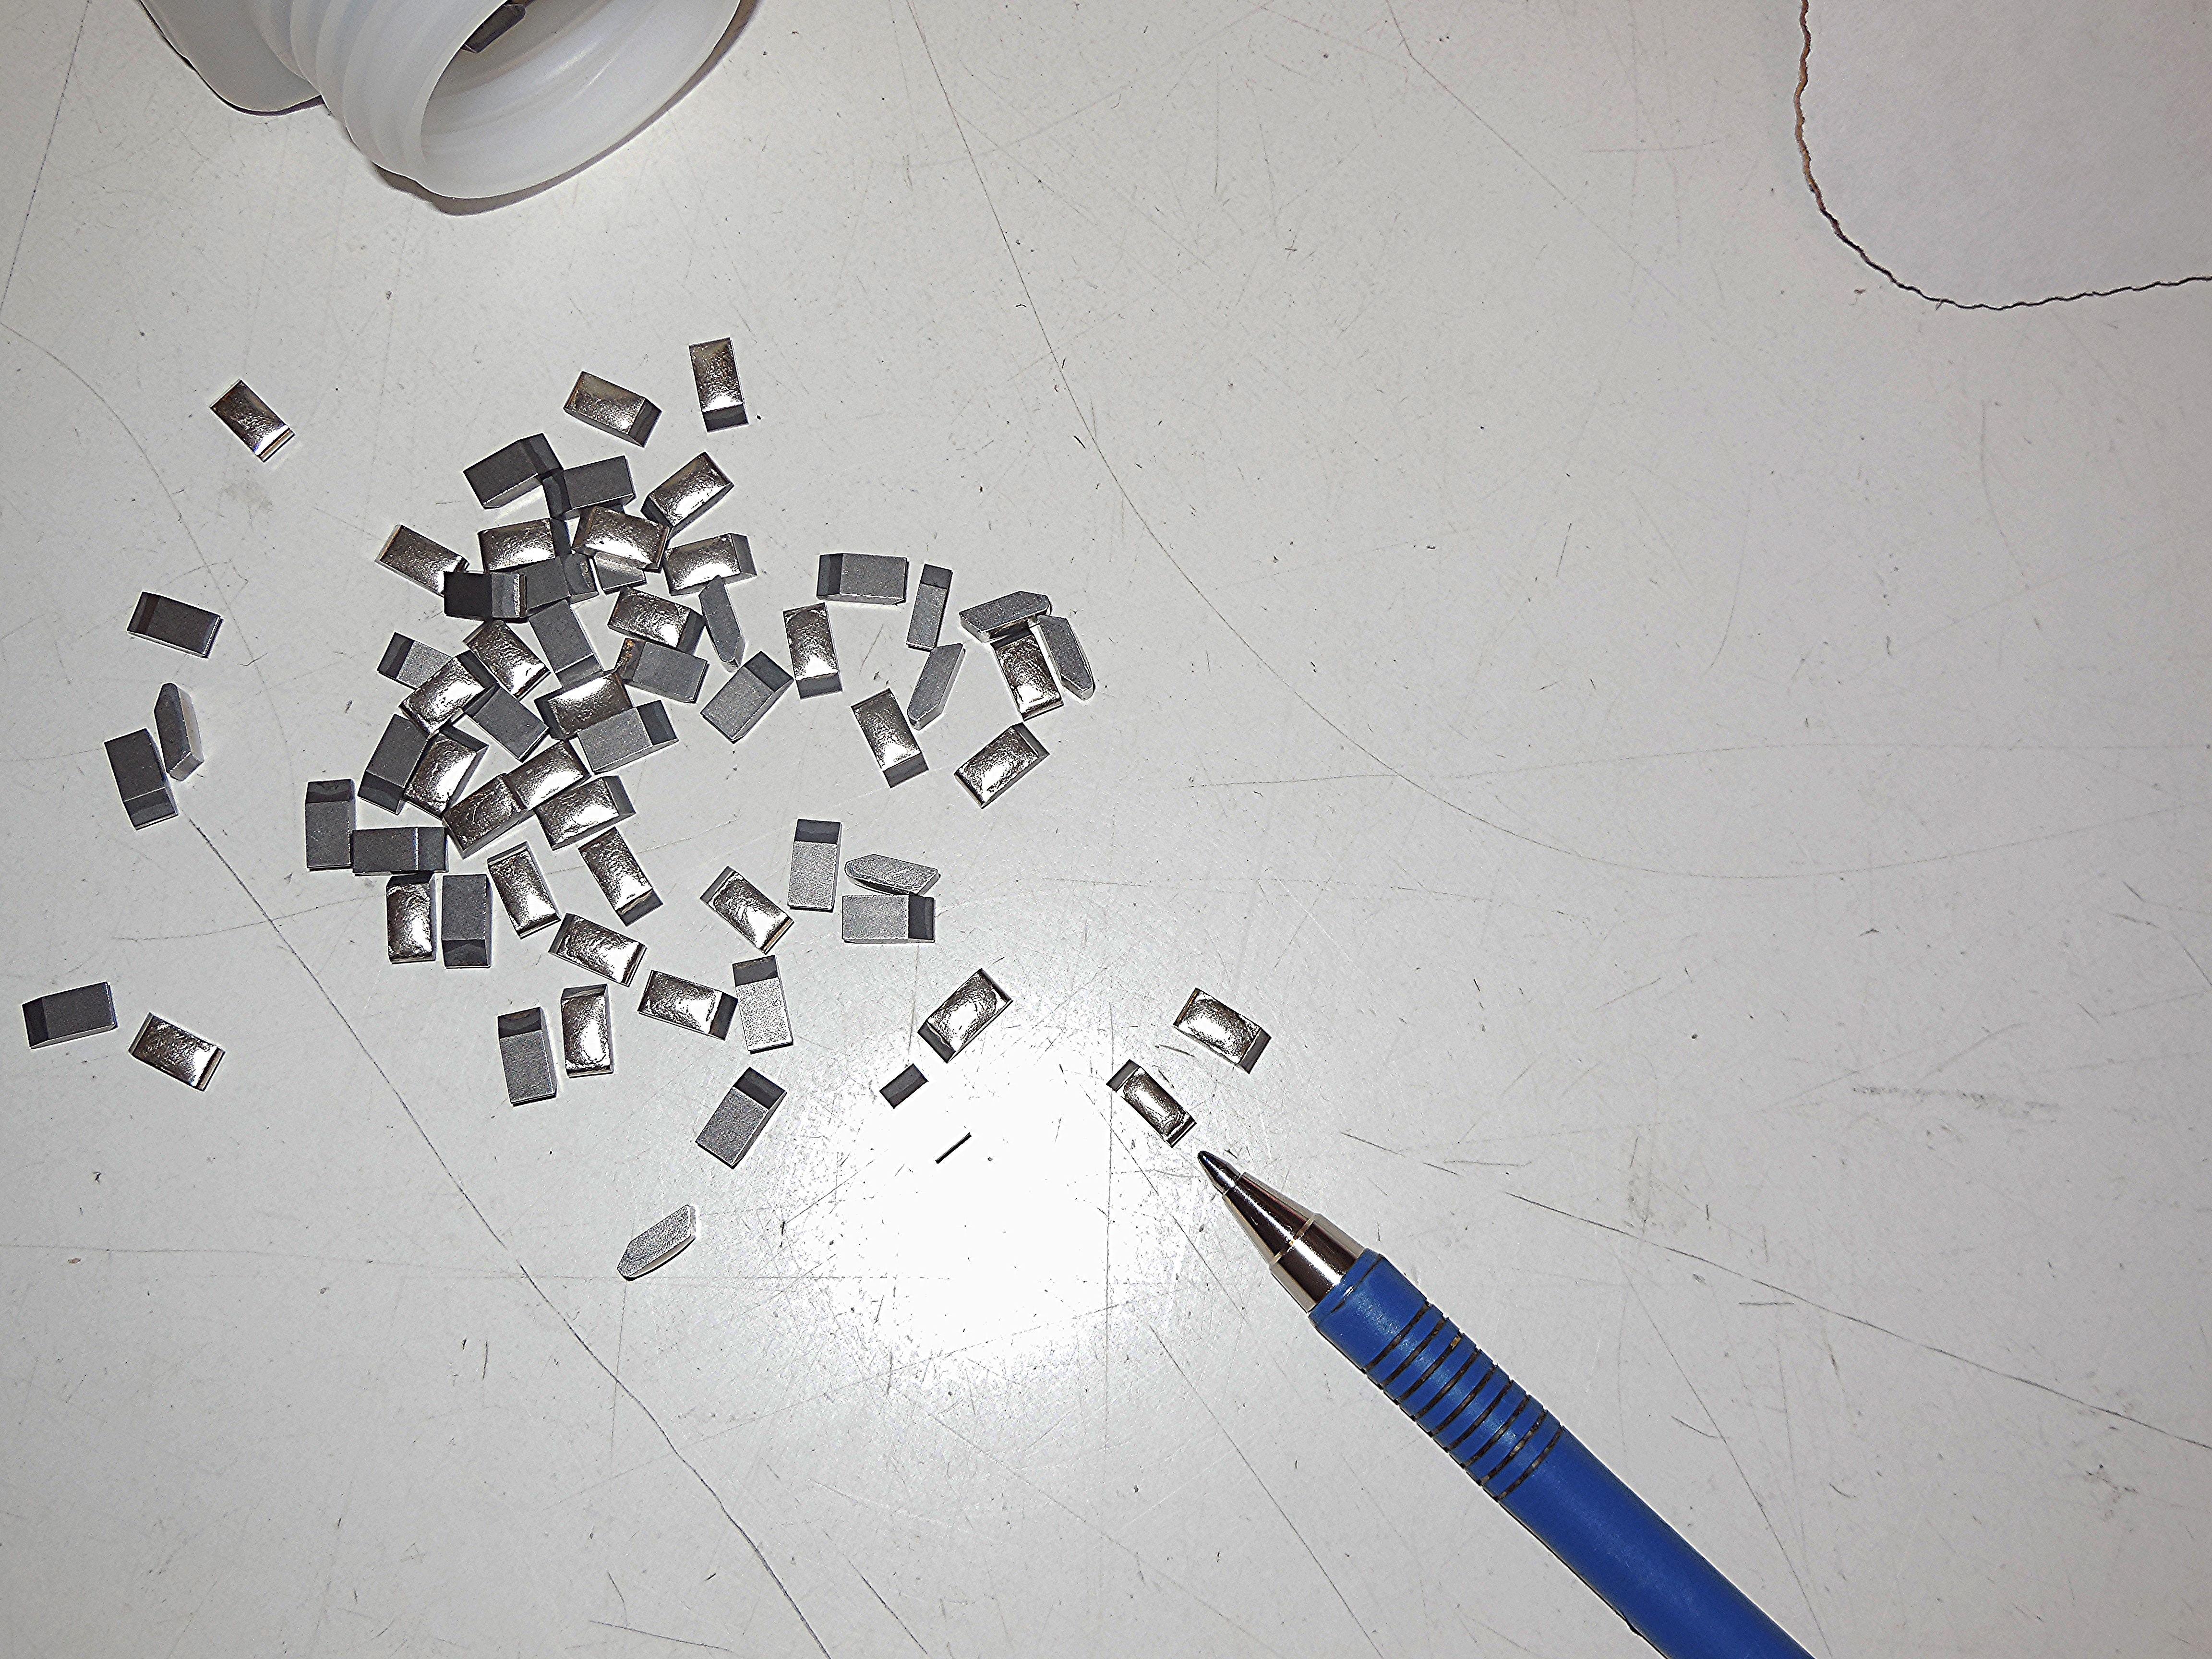 I know you could tell the difference immediately!
You can imagine how frustrating it is to receive mixed tips and the amount of accuracy that is involved in counting or sorting them.
The same care is applied when we pretin carbide tips; each piece of braze is methodically placed on each individual tip after it has been coated with our high performance Purified Flux. A steady hand, a pair of tweezers, superior products and uncompromising labor are all you need!
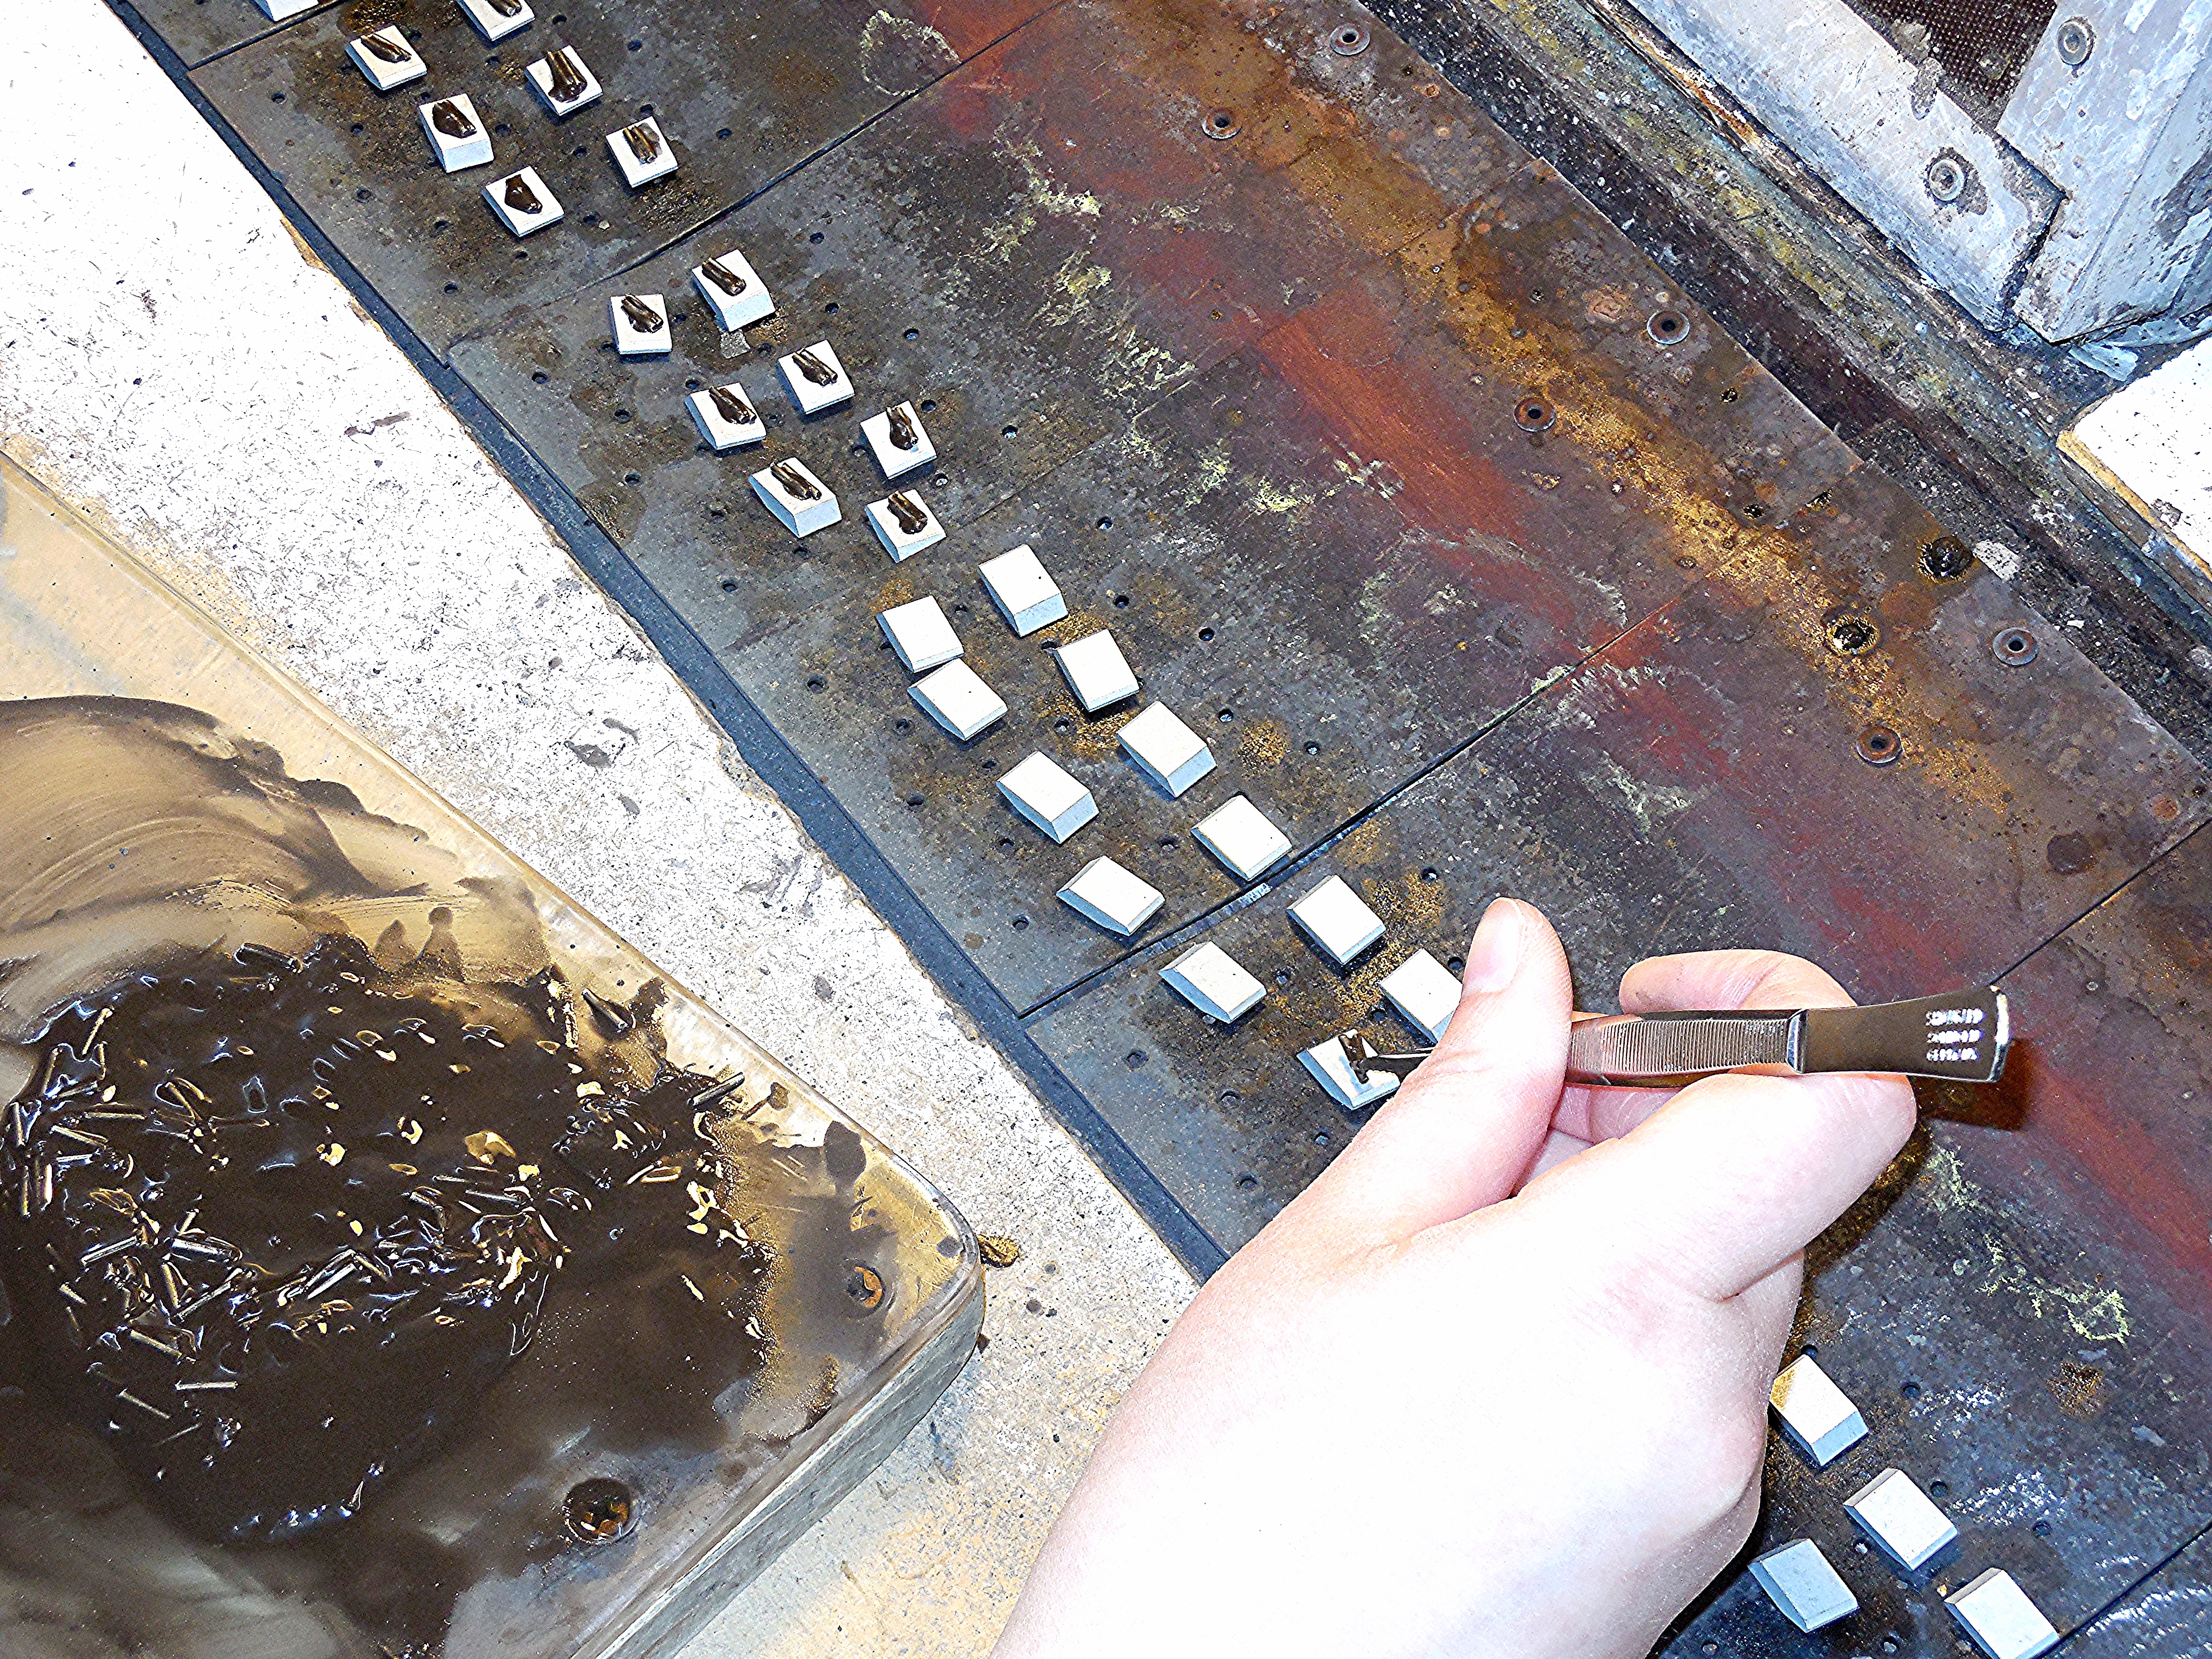
Once the carbide saw tips go through the “oven” and are heated up to about 1500 degrees, most of them go through a chemical wash to clean all the flux off. Once the carbide tips are dry we sort through them to make sure each tip was properly tinned, or to verify that none of the tips are compromised in any way.
The Purified Flux we use for brazing our carbide saw tips have had extra processing steps. These extra steps take the black article out and leave the flux a rich, creamy brown color.
The original idea with flux was that it was to be applied on top of the braze area. No special effort was made to purify the flux because it worked well and most manufacturers wanted to keep costs down.
However the critical part of saw and tool brazing is what goes on inside the braze joint. Ordinary flux is inexpensively made and has up to 10% odd size particles and non-active minerals in it. These odd size particles and non-active minerals get lodged in the braze area and can seriously effect the strength of the braze joint. Purified flux is cleaner, smoother, creamier and much more effective.
As you can see we take the utmost care in providing you with quality carbide saw tips brazed with superior flux and processed by a company who genuinely cares.
Southeast Tool Manufacturing Process
Posted on Tuesday, June 24th, 2014 at 4:05 pm.
Making high quality router bits is not an easy, one step process. Producing the best router bits requires an immense amount of meticulous attention to detail. It requires the highest quality tool material, top-notch machining, and consistent testing of the tools to ensure the tightest tolerances are being maintained.
Southeast Tool has been mastering the art of producing longer lasting router bits that cut beautifully and stay sharp for over 15 years. Chuck Hicks, the founder and owner of Southeast Tool started the process in the basement of his home in 1998. What began as a mission to supply quality cutting tools that focused on meeting the needs of the customer has developed and flourished. Now Southeast Tool manufactures quality router bits with the same focus for customer needs in a 20,000 sq ft building in Conover, NC and has additional stocking warehouses in Portland, OR and Ontario, Canada.
Southeast Tool stocks and sells more than 6,000 different cutting tools including router bits for woodworking and plastic, boring bits, solid carbide spirals, brad point drills, and various other cutting tools.
Southeast Tool is constantly keeping the customer’s needs in mind, pushing them to be innovative and come up with new tools to fit the needs of the tool users. They have a special line of long wear spiral router bits that use an advanced grade of micro grain carbide that lasts up to 40% longer than standard carbide. This special grade of micro grain carbide paired with Southeast Tool’s precise manufacturing process makes these spiral bits truly unique and superior to other bits you may find on the market.
Attention to detail, skill and great craftsmanship will go a long ways, but having top-notch machinery along with these is how you produce superior tools. Southeast Tool’s manufacturing process brings all of these things together. Southeast Tool takes careful precaution to make sure the design of their tools is completely accurate and without flaw. The tools are first designed on the Walter program where skilled expert tool technicians can watch the diamond wheel paths to make sure there are no problems with the travel of the wheels. The program is then downloaded into the Walter Helitronic machine. During the production process, each tool is visually inspected and every third tool is taken and inspected on the Walter Tool check machine to measure the exact specifications and make sure all tolerances are within specs.
The Walter Helitronic is a top of the line grinding machine with 5 CNC controlled axes for producing and regrinding cutting tools. Southeast Tool uses the Walter Helitronic machine to produce router bits to the tightest tolerances. Their spiral router bits are held to tolerances of +/- .002”. Southeast Tool’s Walter Helitronic machine features an automatic “Smart Probe” measuring and positioning system to ensure the exact and precise cutting and grinding of each tool they produce.
We have always offered a 100% satisfaction or money back guarantee. We do this and continue to do this because we truly believe in the quality of the products we sell. Try a Southeast Tool and see the difference that a thorough and rigorous manufacturing process can make for your cutting tools. Shop and save on your next Southeast Tool router bit or other quality cutting tools here.
Why Are There So Many Router Bits?
Posted on Monday, June 23rd, 2014 at 2:04 pm.
 If you have ever done any type of wood work you have encountered the wide world of router bits. Router bits range in shape, size, style and vary depending on application; when you visit the local store you will see them, almost identical looking stacked neatly side by side, a virtual sea of all shapes and sizes, and somewhere in there is the router bit you need. I won’t be able to cover every type of router bit there is, but I will cover the most common. Here is a crash course or refresher in what each router bit is used for:
Quality over Cheapest
Good quality router bits are sharp, and stay sharp for a long time (with proper use). They are well balanced and create minimal vibration; they are designed for excellent cutting geometry and have excellent chip ejection properties (work comes to a standstill because of chip buildup).
Most woodworkers prefer carbide tipped router bits because they can hold their edge between 10 and 25 times as long as high speed steel bits. They are also made of high quality, fine grained carbide, which allows for a sharper cutting edge.
Straight Router Bit
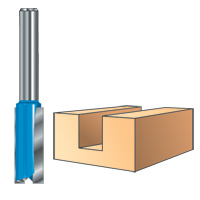 Straight router bits are among the most common frequently used of all bits. Straight bits are used to make cuts straight down into a material to form a groove, dado or to hollow out an area for a mortise or inlay. Straight bits come in a variety of cut diameters, most commonly in the range from 3/16″ to 1-1/2″.
Rabbeting Router Bit
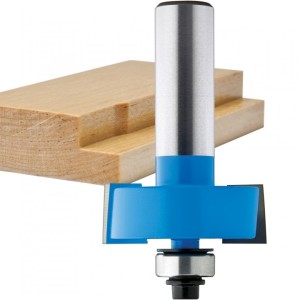 Rabbeting router bits produce a straight vertical and horizontal cut, and are designed specifically to cut a rabbet (notch) in the edge of a material. These bits are an example of a “piloted” router bit, meaning that a bearing at the top of the bit is used to guide along the edge of the material. Rabbeting bits usually come in a set that includes a range of pilot bearing diameters, allowing a single bit to produce a variety of rabbet dimensions.
Flush Trim Router Bit
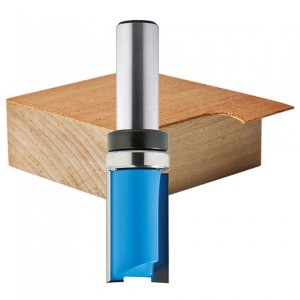 Flush trim router bits are guided by a pilot bearing that is the same size as the bit’s cutting radius. They’re used to trim the edge of one material flush with the edge of another material. Trimming a veneered surface flush with a substrate, or using a pattern to create multiple identical shapes are examples. The pilot bearing may be on the top of the bit, the base of the cutting edge, or both.
Chamfer Router Bit
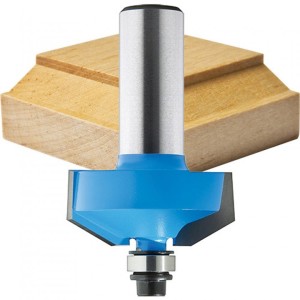 Chamfer router bits are designed to cut the edge of a part or panel at an angle. They are also can be used in joinery to create beveled edges for multi-sided constructions.
Edge Forming Router Bit
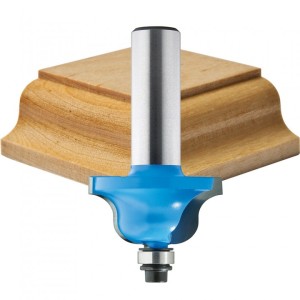 Edge forming router bits are most often used to cut a decorative edge into a material. Many edge forming bits include a pilot bearing. In most cases, the bits are used for final decoration of a project where edges are already established and can serve as the guide for the bit. A few examples of edge forming router bits are: Ogee router bit which refers to the “S” shaped profile; Round over bit which is used to cut a rounded edge of a given radius.
Molding Router Bit
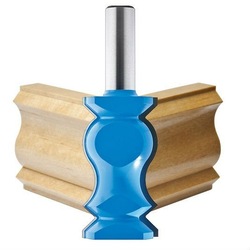 Designed for architectural molding profiles, molding bits are typically larger than basic edge forming router bits. Molding bits may incorporate multiple basic edge forming profiles into a single router bit. Because of their size, molding router bits most safely used in a router table.
Visit our website for more detailed information to help you choose the right router bit for your next project.
Why Do Saw Blades Scream
Posted on Monday, June 9th, 2014 at 3:21 pm.
It does not happen very often. Nobody likes it. It really is not anybody’s fault, but some saw blades just scream on some machines.
Sometimes a good saw shop can retention the blade and solve the problems. Maybe once every year or two we sell a blade that screams and we just replace them.
Good saw blades are tensioned so that they run straight and true. In saw blades the inside and the outside a blade run at the same rpm but the outside covers a lot more distance so it runs faster. This gives the blade a tendency to curl over which is highly undesirable for a variety of reasons. A tensioned blade will use the inherent and/or induced tension in the steel to counter the tendency to curl over.
Because of the quality of the steel and the tension, they behave somewhat like a tuning fork. As hard as the industry tries it is so far impossible to make every blade identical. Currently, the state-of-the-art is at a level where the problem is that no two pieces of steel are identical just as no two places in the same piece of steel are identical.
Every machine is slightly different. Every machine has a different vibrational frequency no matter how slight.
When the right blade is put on the right machine then you get screaming because the frequency of the blade matches the frequency of the machine.
You can change the frequency of the sawblade with slits or slots or scrollwork or copper plugs at the end of the expansion slots and that may work.
You can change the frequency of the machine. About the only practical way to change, the frequency of the machine is by altering the shape of the blade guard. Some guards actually have a little sliding door in them somewhere. Typically, the operator has no idea what the door is for.
One way to test this is to remove the saw guard, run the machine, and see what the noise level is. This is purely for testing. You do not want to run the machine without a guard for any reason. Running this particular test can give the operator the idea that running the machine without a guard is a good idea.
Saw blades have critical speeds. When a saw blade hits a critical speed, it wobbles. Sometimes it is just a plain wobble. Sometimes it is a more complicated wobble and this is called ‘potato chipping’ because the blade sort of looks like a potato chip in slow motion. Once you get past the critical speed, the blade straightens out until you hit the next critical speed.
Whiteside Ultimate Trim Bits
Posted on Wednesday, June 4th, 2014 at 9:48 am.
Whiteside has recently come out with a new line of Ultimate Trim bits that include an Ultimate Flush Trim bit (Whiteside UDFT9112), Ultimate Pattern-Plunge Bit (UDP9112), and Ultimate Combination Bit (UDC9112). Each bit in the New Ultimate Trim Bit series has a 7/8″ cutting diameter, 1 1/8″ cutting length, and 1/2″ shank.
This new Whiteside Ultimate Trim Bit series was originally engineered and designed for industrial applications for CNC machines. The Whiteside Ultimate Trim Bits have a compression spiral design and a ball bearing guide that makes them easy to use in a router and allows them to produce superior quality trimmed edges. They are perfect for working with a template or when using a router to flush trim edges and create matching wood surfaces.
Like all Whiteside Router Bits, these new Ultimate Trim bits are made to the highest quality standards, right here in the USA. For over 40 Years, Whiteside has consistently produced quality cutting tools, which has given them a name recognized for quality and dependability. Whiteside uses thick pieces of high quality micro grain carbide so that it keeps a sharp edge and can withstand extra sharpenings. These new Whiteside Ultimate Trim Bits are a great addition to an already quality line of cutting tools.
